Greg Reese is a first-generation regenerative farmer leading Fox Point Farms in Encinitas, California
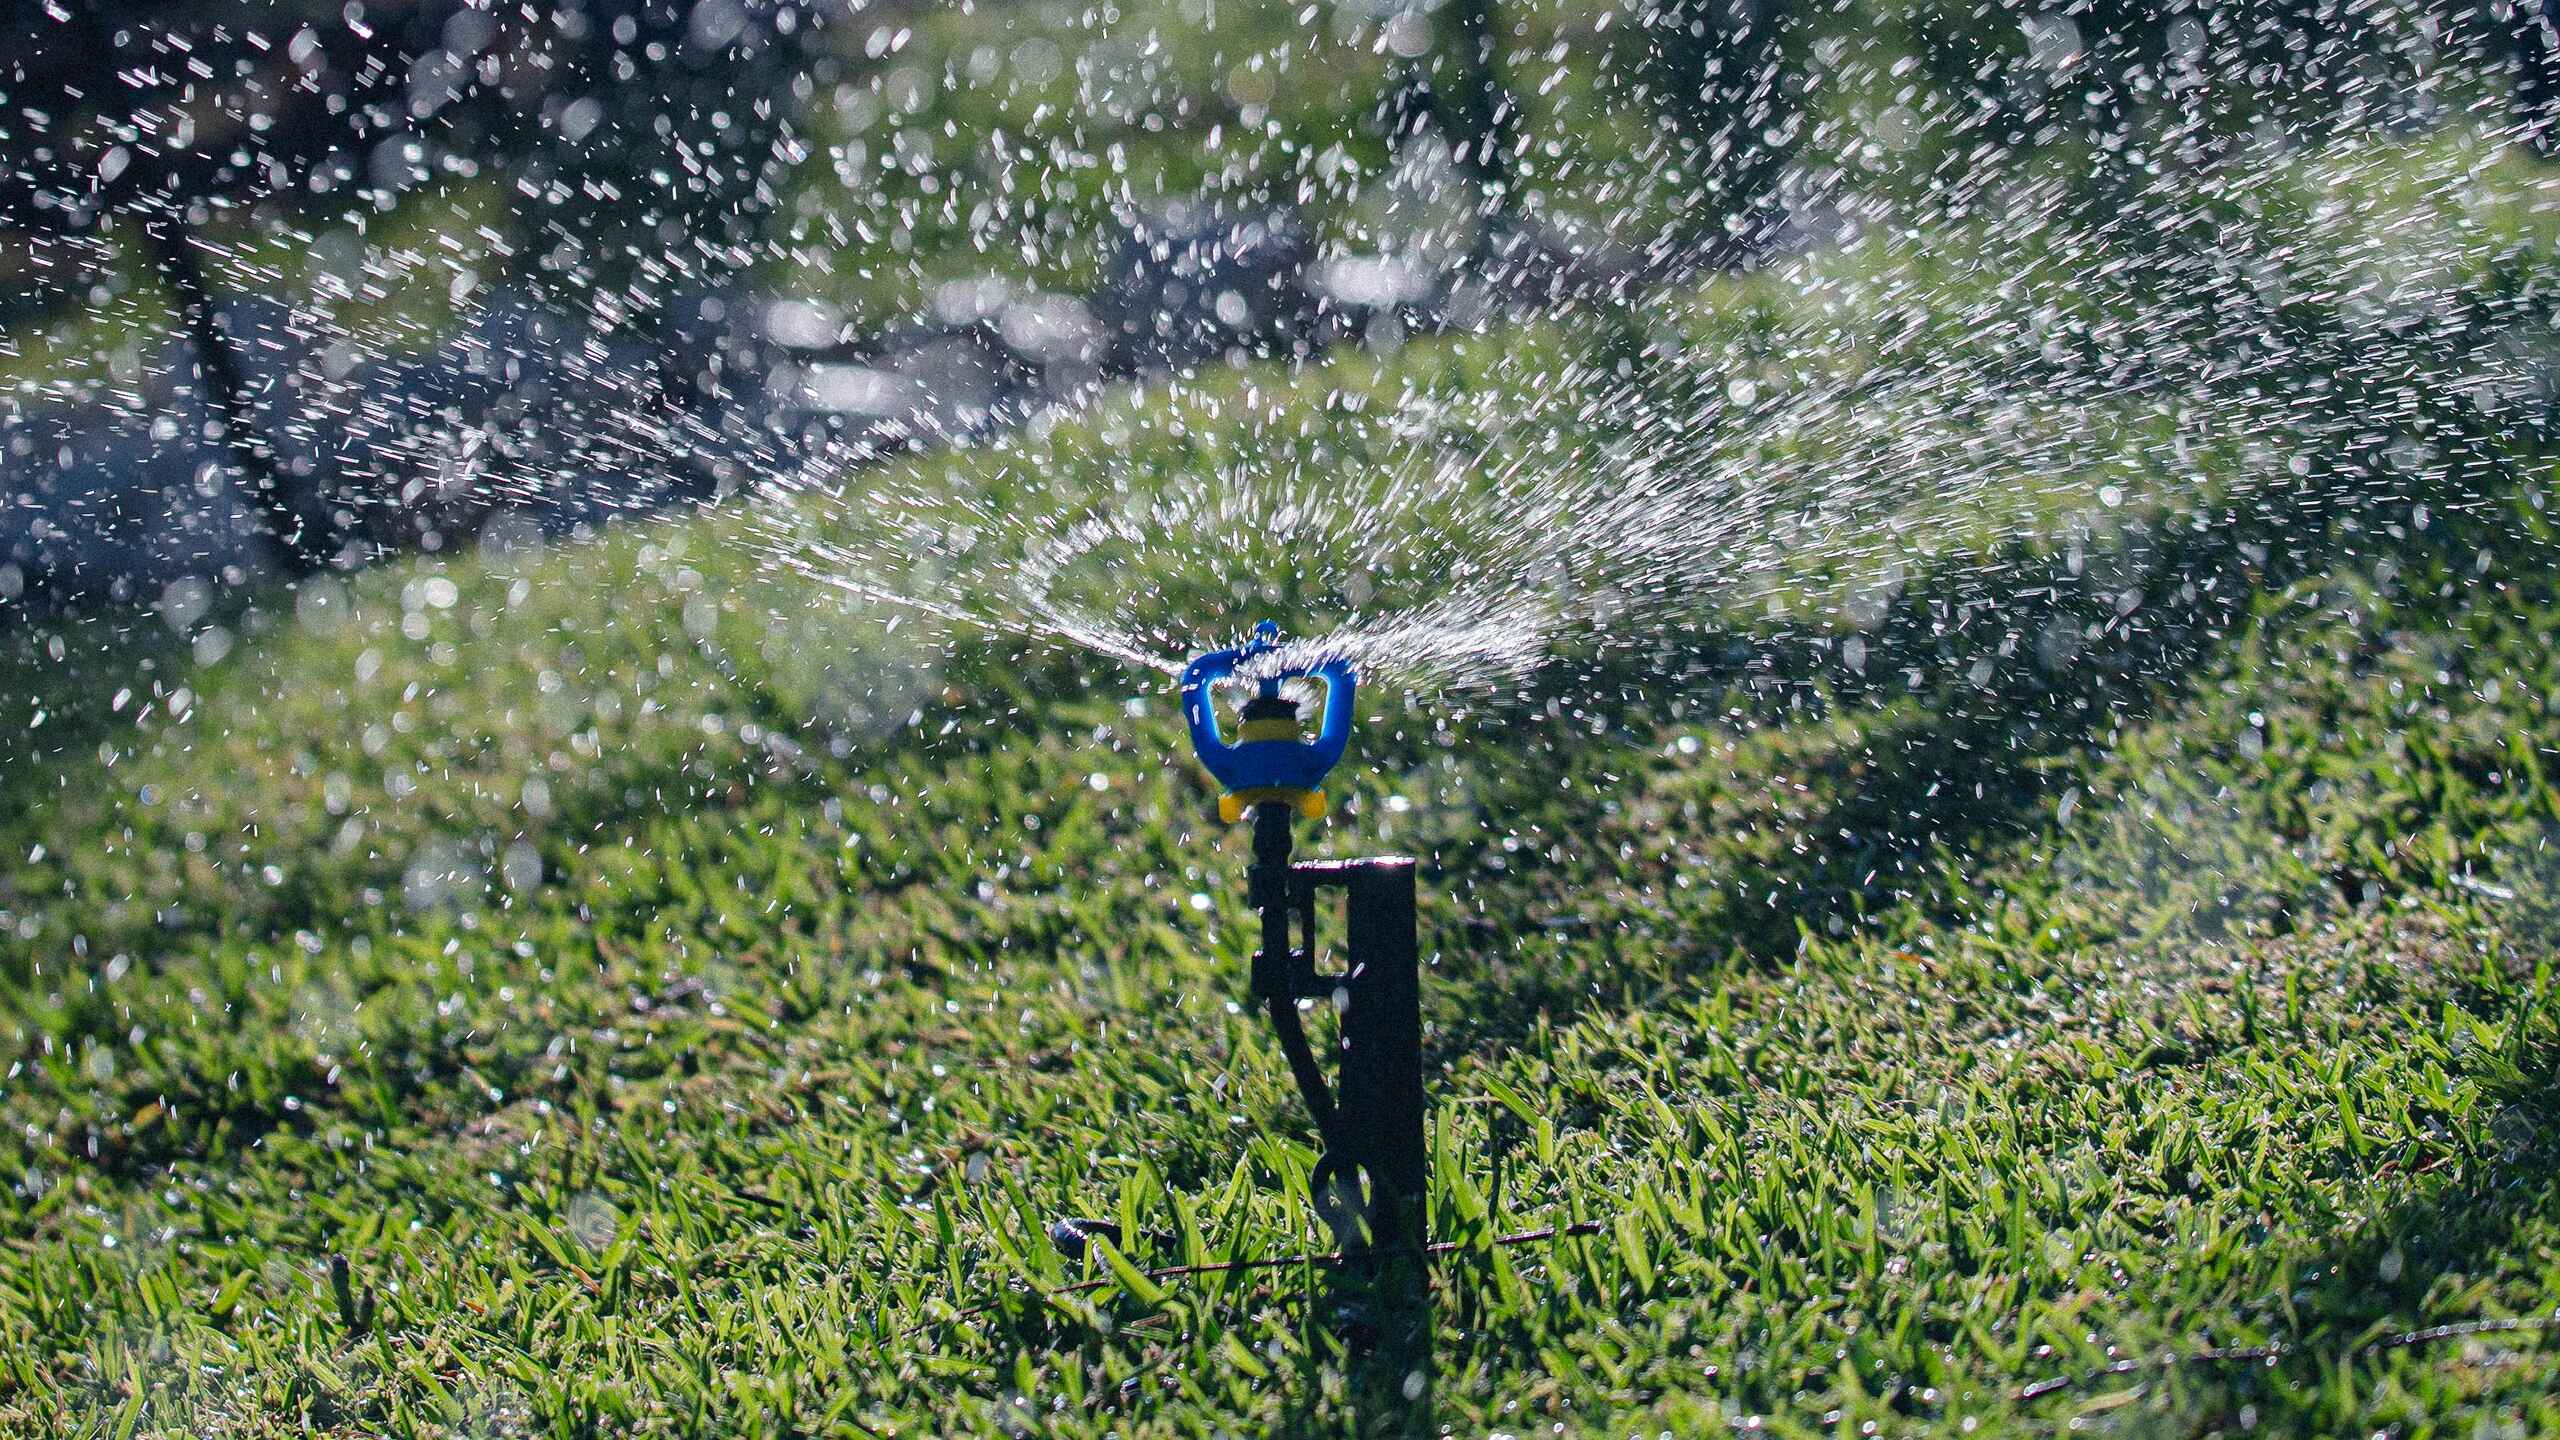
How to Set-up Micro-sprinklers
Learn how to set up micro-sprinklers for even, full-coverage watering that supports strong germination and healthy early growth.
Key takeaways for setting up micro-sprinklers from a drip supply line:
Materials and Components:
Black poly tubing - main supply line
Micro-sprinkler heads - available in various shapes and spray patterns
Micro tubing - approximately 8 inches per connection
Barbed fittings - for connecting sprinklers to the supply line
Hole punch tool - for creating entry points in the tubing
Stakes - to hold sprinklers upright in place (optional)
Installation process
Plan sprinkler spacing across the garden bed for even coverage.
Sprinklers are typical spacing is about 2-3 feet apart
Some sprinklers feature a 360-degree "umbrella" spray pattern that can be adjusted in size by twisting the top clockwise or counterclockwise
Use a hole punch tool to create an opening in the black poly tubing
If needed, use the back of a micro-sprinkler to carefully create the hole
Insert the barbed fitting into the opening until it locks securely
Attach micro tubing and position the sprinkler head as needed
Once connected, the flexible micro tubing allows for customized placement based on plant spacing
Secure the sprinkler with a stake (if required)
Turn on water to test flow and coverage
Ending the Supply Line: The poly tubing must be sealed to stop water flow. Use a manufactured end cap for a simple closure or use a figure-eight (crazy eight) clamp. For the figure-eight clamp, slide it onto the tubing, pinch the end closed, and loop it back through to lock it in place.
Más Artículos Educativos


Apoya nuestro trabajo

Mantente conectado
Recibirás nuestro boletín mensual Field Notes, actualizaciones de proyectos y recursos gratuitos, además de acceso prioritario a nuevas historias.

Haz una donación
Tu donativo deducible de impuestos impulsa las historias que transforman la cultura, la organización que convierte la conciencia en acción colectiva y las relaciones que hacen posible el cambio sistémico a largo plazo.